1 Setting Up Git Repositories
In this section you will learn how to set up Git repositories, how to host them on GitHub, and how to copy existing repositories. Before proceeding, make sure that you have everything you need to get started.
When running these commands on your own computer make sure to use your own GitHub username and the directory in which you want to set up your repository. The examples on this page are commands used to set up the repository that contains this website (i.e. username: reroche, directory: ~/cmu/76270/project4/github-instructions). This repository is used in most examples throughout the guide.
1.1 git init
The init command creates an empty git repository – a hidden .git directory containing everything you need for version control in this repository.
When do I use this command?: Use git init whenever you want to turn an existing directory into a new Git repository.
Command Line
To initialize a repository from the command line:
- Open Terminal, and navigate to desired parent directory:
This directory will contain the git repository.
$ cd ~/cmu/76270/project4/
Create a directory for your repository:
$ mkdir github-instructionsNavigate to new directory:
$ cd github-instructionsInitialize the repository:
$ git init
GitHub
On github.com, the init command is run automatically when a repository is created. Ensure that you are logged in before following these steps:
- Navigate to home page:
- Click on the green New button on the top-left of the page:
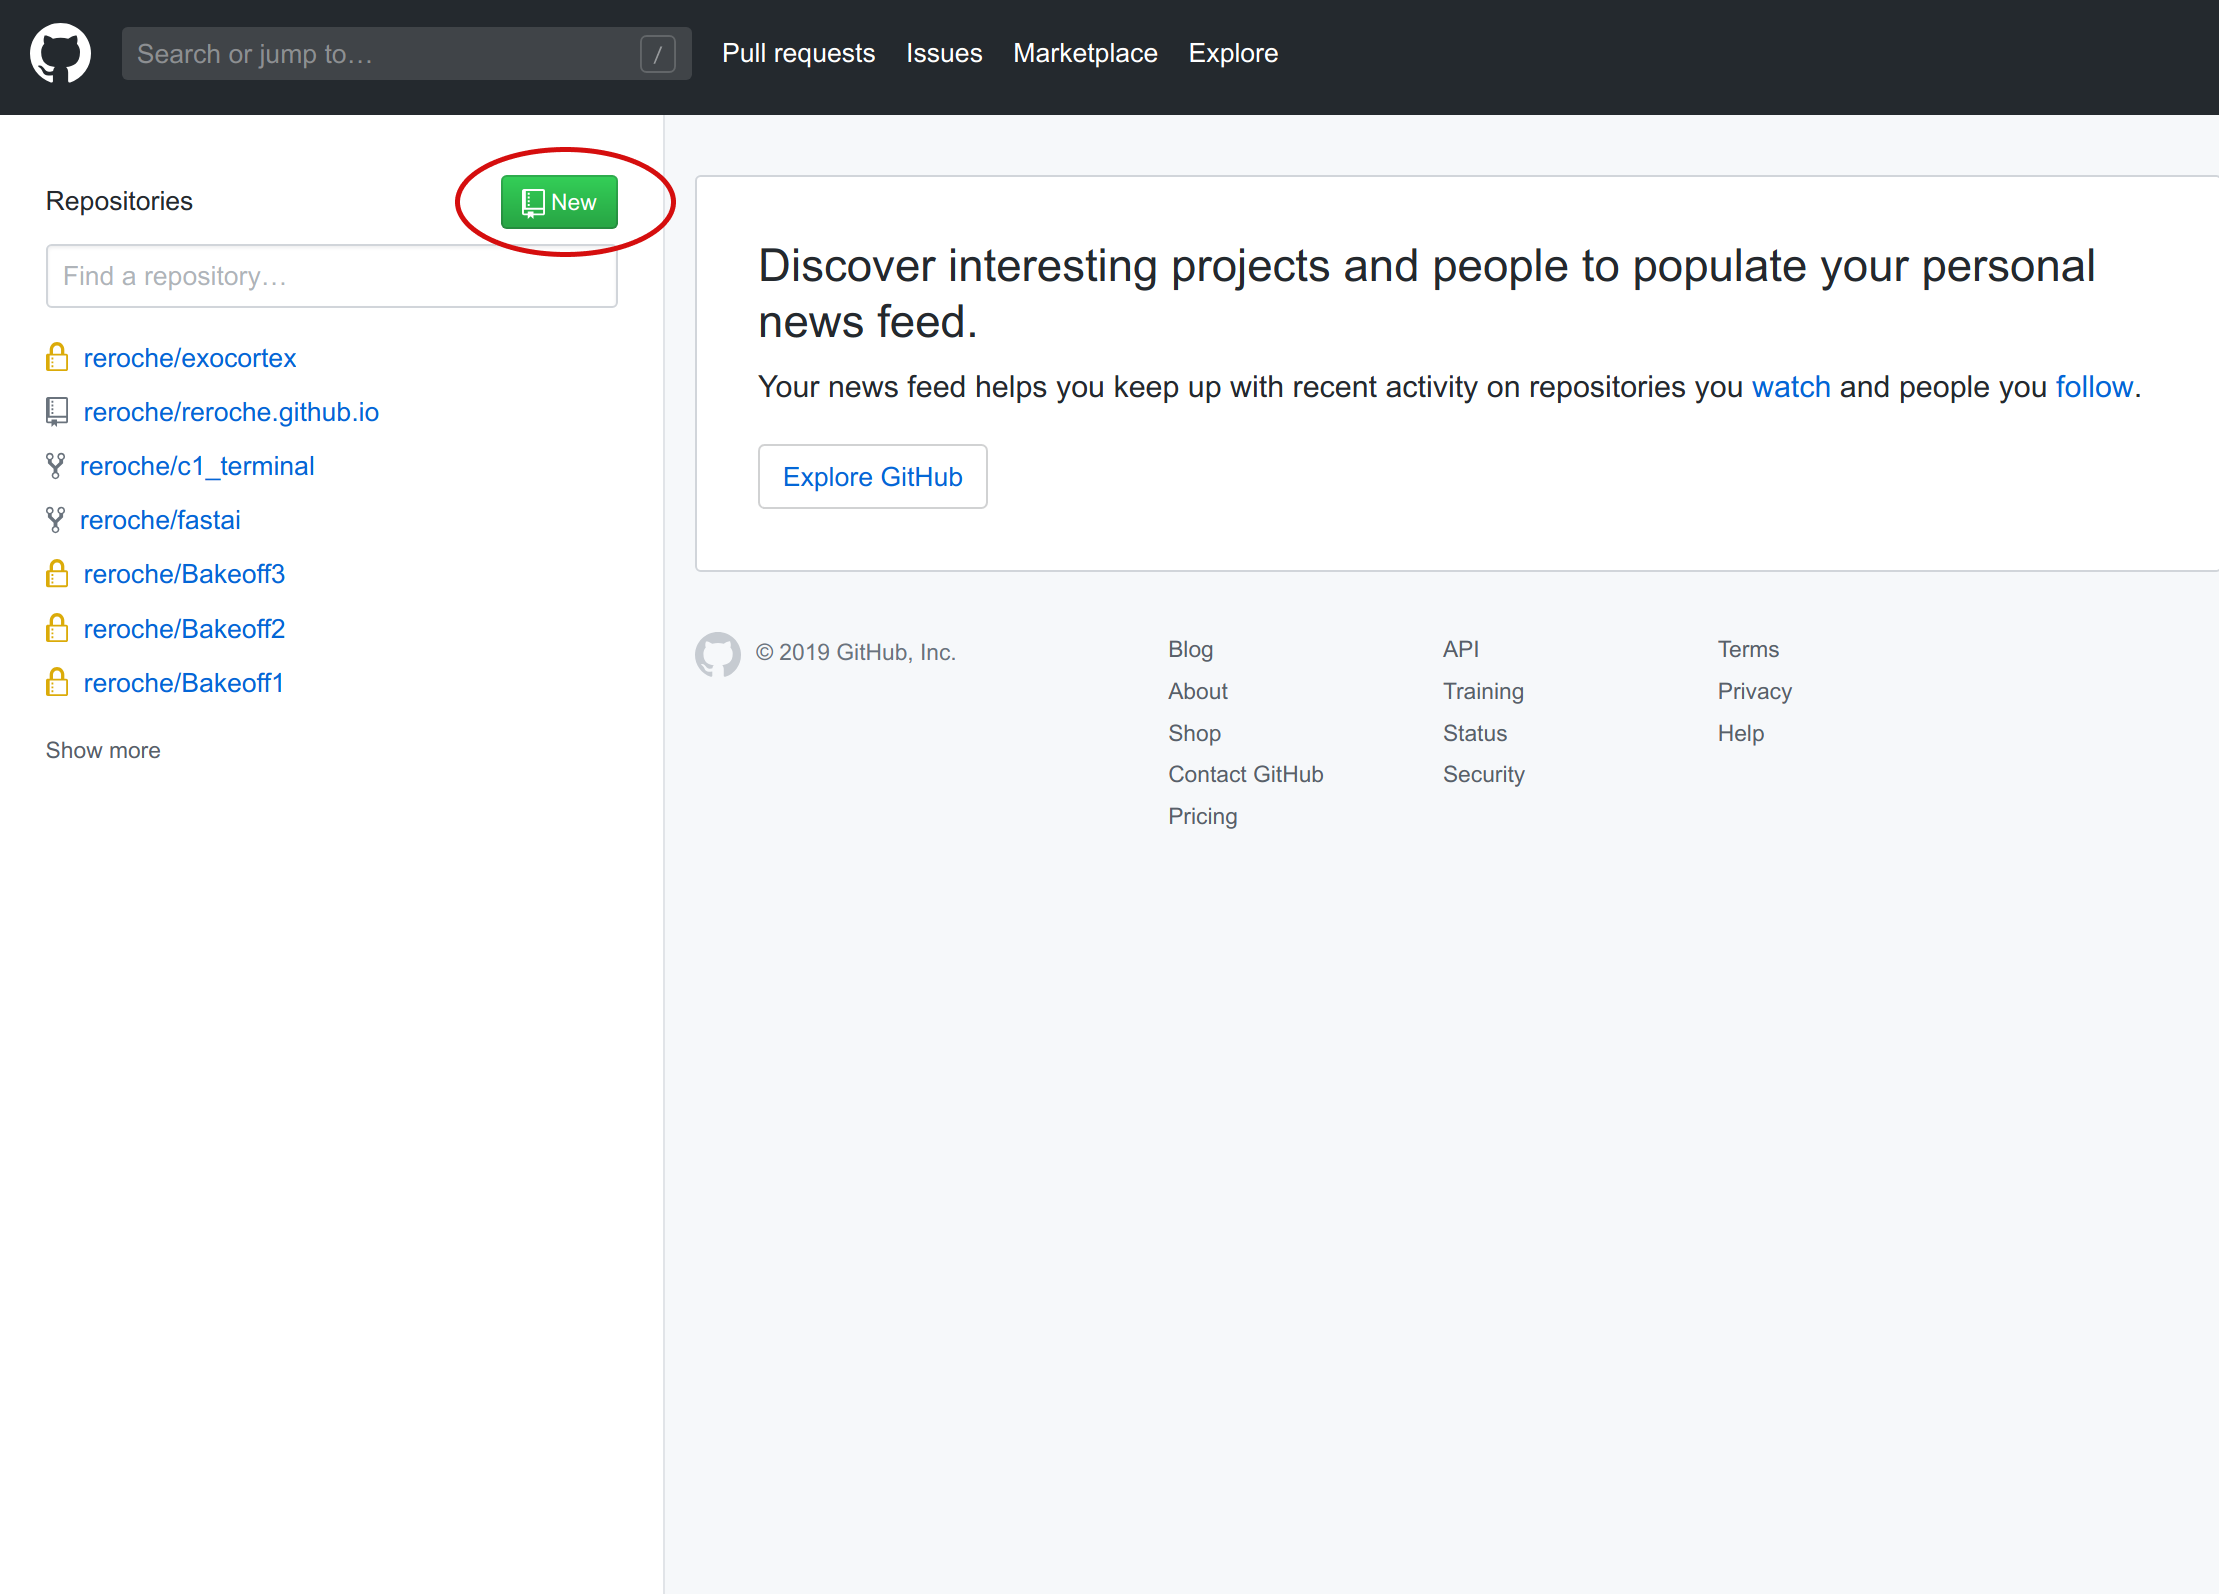
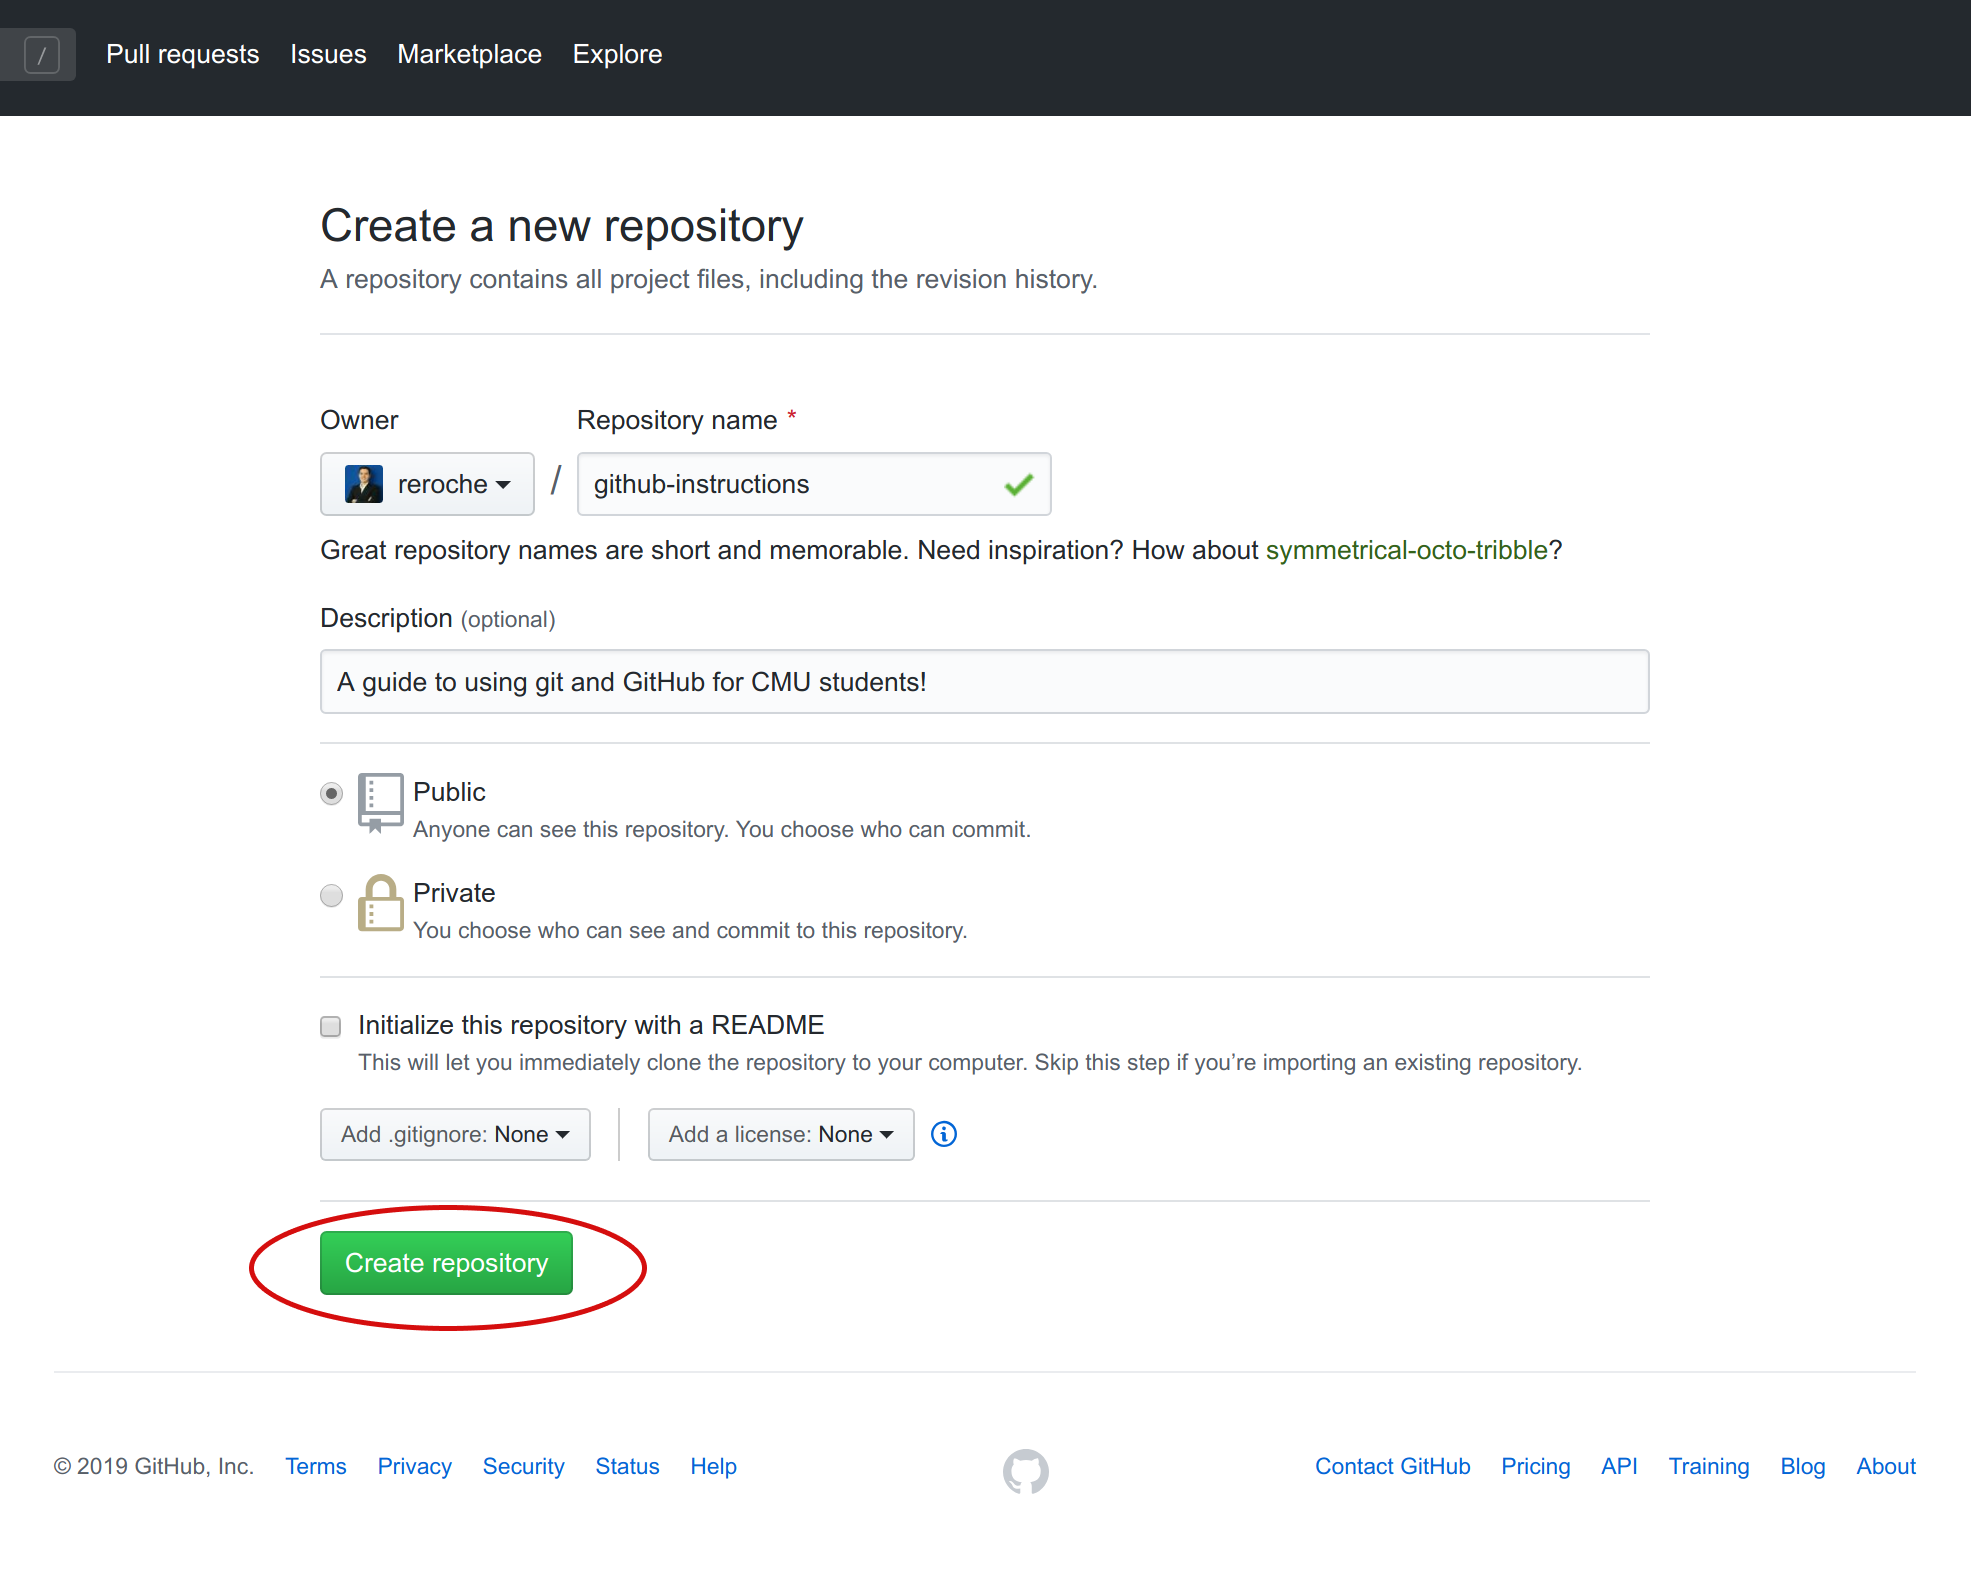
- Enter a name for the repository:
- The name of the repository must be unique to your user – that is, you cannot give two repositories the same name.
- Enter additional customizations:
- You can include an optional description to provide more information about the purpose of the repository.
- Repositories can be public or private. In a public repository, others can view and use your code, but in a private directory, only you and invited users can access the repository.
README.md,.gitignore, andLICENSEare typical files to include in a repository. They are addressed in a later section.
- Click on Create Repository to complete.
- The page will be redirected to the empty repositories home page.
- Finally, set up the repository. For example, let
rerochebe the username of our GitHub account andgithub-instructionsbe the name of our repository:
You can create a new repository on the command line by running:
$ echo "# github-instructions" >> README.md
$ git init
$ git add README.md
$ git commit -m "first commit"
$ git remote add origin git@github.com:reroche/github-instructions.git
$ git push -u origin master
Or you can import an existing repository on your computer into this GitHub new repository by running:
$ git remote add origin git@github.com:reroche/github-instructions.git
$ git push -u origin master
More details regarding these Git commands are discussed in later sections.
1.2 git clone
The clone command creates a copy of a repository into a newly created directory.
All repositories on GitHub have a unique URL, in the format:
https://github.com/username/repository-name.git
The repository for this website, for example, is available at https://github.com/reroche/github-instructions.
When do I use this command?: Use git clone whenever you want to download an existing repository into a new directory. If a team member has set up a repository with your code, you use this command to download the repository and start collaborating.
Command Line
To clone a repository from the command line:
Open Terminal, and navigate to desired parent directory:
$ cd ~/cmu/76270/project4/Clone the repository using its GitHub URL:
- The new repository will be in a directory with its original name (e.g.
github-instructions).
$ git clone https://github.com/reroche/github-instructions.git- The new repository will be in a directory with its original name (e.g.
This repository has now been downloaded to ~/cmu/76270/project4/github-instructions.
GitHub
The online interface allows you to easily browse and copy repository URLs to clone via the command line.
To clone or download a repository from GitHub:
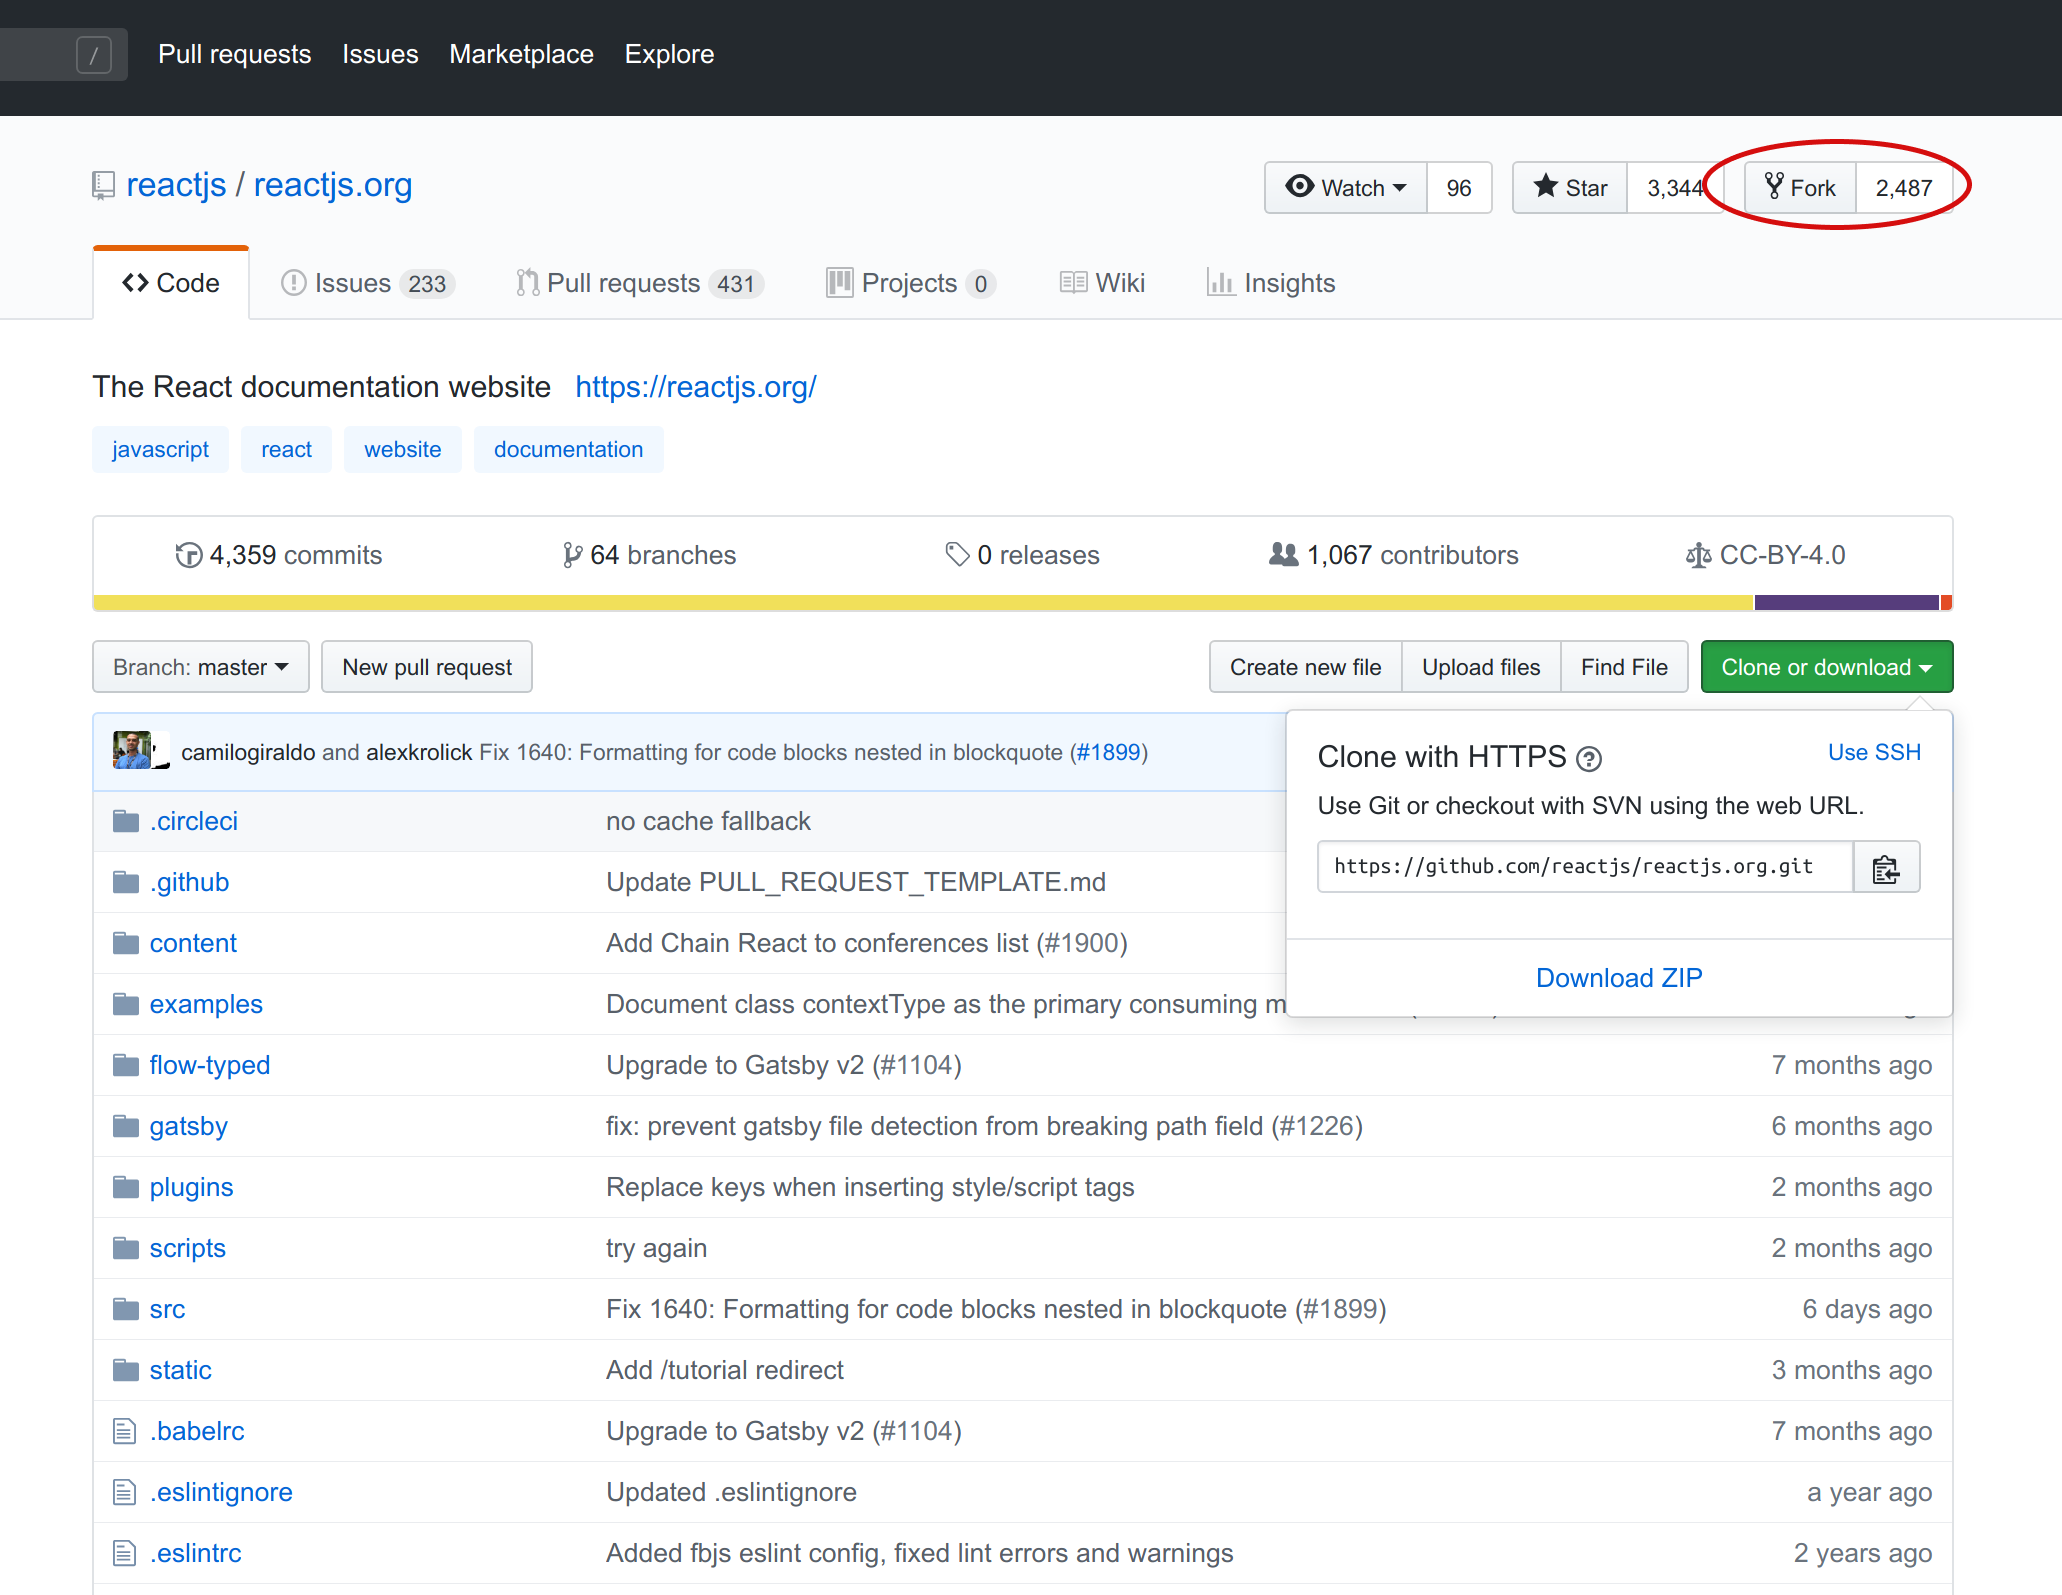
- Navigate to the repository URL:
- For example:
https://github.com/reactjs/reactjs.org
- Click the green “Clone or download” button:

Copy the link and clone from the command line, or download ZIP file.
$ git clone https://github.com/reactjs/reactjs.org.git
1.3 Forking on GitHub
Forking is copying a repository that belongs to another user into your repositories, granting you ownership permissions over that repository.
For example, forking the repository at https://github.com/reactjs/reactjs.org will create a copy of this repository at https://github.com/your-username/reactjs.org. You will have ownership over the repository, allowing you to make changes to your version of the code.
Note that forking is GitHub feature and not a Git command, so forking cannot be done via the command line.
When do I use this feature? You can fork a repository whenever you want to make changes to a repository that is not owned by anyone in your team. For example, if there is a repository with scaffold code for your own project, you can fork that repository to start making your own changes with your team.
To fork a repository on GitHub, simply click the “Fork” button on the top right of a repository’s home page.